


So your pool surface feels like a cheese grater, looks like it lost a fight with a permanent marker, or has those weird, rough patches that catch every swimsuit on the way past. That usually means one thing. It’s time for pool resurfacing, the process of stripping off the old, worn-out finish and giving your pool a fresh, smooth interior that actually feels good to swim in again.
The good news is that pool resurfacing isn’t some mysterious black box of construction wizardry. It’s a clear, step-by-step process with a logical order, and once you know what each stage looks like, the whole project feels a lot less intimidating. Whether you’re getting your first quote or you’re already halfway through choosing a finish, understanding the steps helps you ask better questions, spot shortcuts, and feel confident about where your money is going.
Key Takeaways
Here’s the short version:
- Pool resurfacing replaces the worn interior finish of your pool, typically lasting 7 to 20 years, depending on the material you choose.
- The full process usually runs 3 to 5 weeks from drain to refill, with the actual hands-on work taking around 1 to 2 weeks.
- Proper prep work, like acid washing, bond coat, and structural checks, is the difference between a finish that lasts 15 years and one that fails in 5.
- Diamond Brite and quartz finishes cost more upfront than basic plaster but typically last twice as long.
- Curing time is non-negotiable, and any contractor who rushes it is setting you up for cracking, delamination, and early failure.
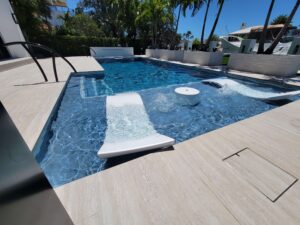
What Pool Resurfacing Actually Means
A lot of homeowners hear “resurfacing” and assume it’s a quick cosmetic patch, like repainting a wall. It’s not. Resurfacing is a full replacement of the interior shell finish, the layer of plaster, quartz, or aggregate material that lines the inside of your pool. That finish is what holds water, protects the structural shell, and gives your pool its color and feel underfoot.
Over time, that surface takes a beating from the sun, chlorine, salt, fluctuating pH, and the occasional rogue pool toy. Once it starts etching, staining, or roughing up, no amount of scrubbing will bring it back. That’s the point where the swimming pool resurfacing guide your contractor walks you through becomes your roadmap for the next month or so.
Signs Your Pool Is Ready for Resurfacing
Most pools don’t fail overnight. They drop hints, sometimes for years, before the surface finally gives up. Knowing the signs helps you plan instead of reacting to a crisis.
Common red flags include:
- Rough, sandpaper-like texture that scrapes feet and swimsuits.
- Persistent stains that don’t budge with normal cleaning or chemical treatment.
- Visible cracks, chips, or hollow-sounding spots when you tap the surface.
- Plaster dust clouds the water or settles on the floor.
- Color fading, dark blotches, or uneven patches across the shell.
If you’re seeing two or more of these, you’re probably overdue. Catching it early matters because once water starts seeping past the finish into the shell, you’re looking at structural repairs on top of the resurfacing bill.
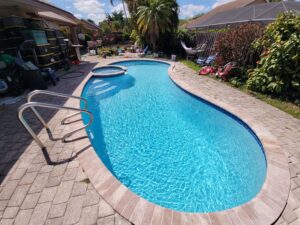
The Pool Resurfacing Process, Step by Step
Here’s where the rubber meets the road. The pool resurfacing process follows a fairly standard sequence, and reputable contractors will walk you through each stage before they ever drain a drop. You can see how our team structures every project on the Poolside Renos process page, which lays out the same logic in real-world terms.
The main pool resurfacing steps look like this:
- Inspection and estimate, where the contractor checks the current surface, structure, and surrounding deck.
- Draining the pool is usually done on day one of your scheduled start week.
- Demo and surface removal, stripping the old finish down to the shell.
- Structural inspection and repairs to fix any cracks or weak points before the new finish goes on.
- Acid wash, bond coat, and prep work to make sure the new material actually adheres.
- Tile or coping work, if needed, is handled before plaster goes in.
- Application of the new finish, hand-troweled in a single working session.
- Refill, startup, and chemical balancing over four consecutive days.
Each step matters. Skipping the prep, for example, is the number one reason new surfaces fail prematurely. The shell and the new finish need a clean, properly treated bond between them, or the whole thing peels and bubbles within a few seasons.
Choosing the Right Finish for Your Pool
Once you know how to resurface a pool, the next big decision is what to resurface it with. The material you pick affects cost, durability, color, and feel underfoot, and there’s no one-size-fits-all answer. Florida pools in particular benefit from finishes built to handle relentless sun and aggressive water chemistry, which is why most local homeowners lean toward quartz-based options. You can explore the full range of materials and what suits different pools on our pool resurfacing services page.
A quick breakdown of the main options:
- Traditional plaster, the most affordable choice, typically lasts 7 to 10 years.
- Quartz aggregate finishes like Diamond Brite, offering 15 to 20 years of life with better stain resistance.
- Pebble finishes, which give a textured, natural look and long lifespans, but cost more upfront.
- Glass bead finishes, the premium tier, are used when homeowners want a high-end shimmer and don’t mind the price tag.
The right pick depends on your budget, how often you use the pool, and how long you plan to stay in the home.
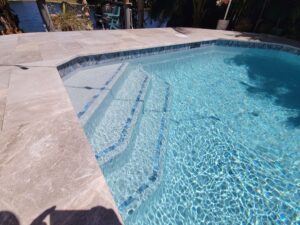
What In-Ground Pool Resurfacing Looks Like in Practice
In-ground pool resurfacing is the most common scenario, and it’s where most of the timelines and price ranges you read about come from. The process tends to run smoother on inground pools because the shell is stable, accessible, and easy to work on from inside once drained. That said, every project has its quirks, and weather, permits, or hidden structural issues can stretch the timeline.
A realistic week-by-week picture usually looks like this:
- Week 1, drain, demo, and structural assessment.
- Week 2, repairs, prep, and any tile or coping work.
- Week 3, plaster application, refill, and the start of chemical balancing.
- Weeks 4 to 5, final curing, fine-tuning water chemistry, and the homeowner walkthrough.
Patience pays off here. Curing chemistry doesn’t care about your pool party schedule.
Ready to Bring Your Pool Back to Life?
If your pool’s been looking tired and you’re ready to actually do something about it, the next step is simple. Talk to a team that does this every day, knows South Florida pools inside out, and won’t sugarcoat what your project needs. Reach out through the Poolside Renos contact page, and we’ll set up a free, no-pressure inspection so you can move forward with a real plan and a real number.
Your pool should be the best part of your backyard, not the part you avoid showing guests. A proper resurface fixes that for the next decade and a half.